Follow the watch our installation video and follow the step by step instructions with photos below.
Please practice with the enclosed sample on the exact surface your decal is going on. (You can remove the test vinyl with your fingers without any damage to your surface.) Some paints and wall surfaces do not take matte vinyl well. Our sample is the best way to know if your decal will adhere properly or if problems might arise. We do not give refunds for used graphics.
Our vinyl has a matte finish and can go on almost any CLEAN, DRY, SMOOTH non-porous surface (walls, glass, plastic, etc). It is removable although not reusable. Please wait 14 days to apply to newly painted walls. If the paint is not cured, the vinyl may not adhere well or stay on long term.
Feel free to e-mail us at info@oldbarnrescue.com with any questions. Thanks again for your business!
LARGE DECAL - Installation Instructions
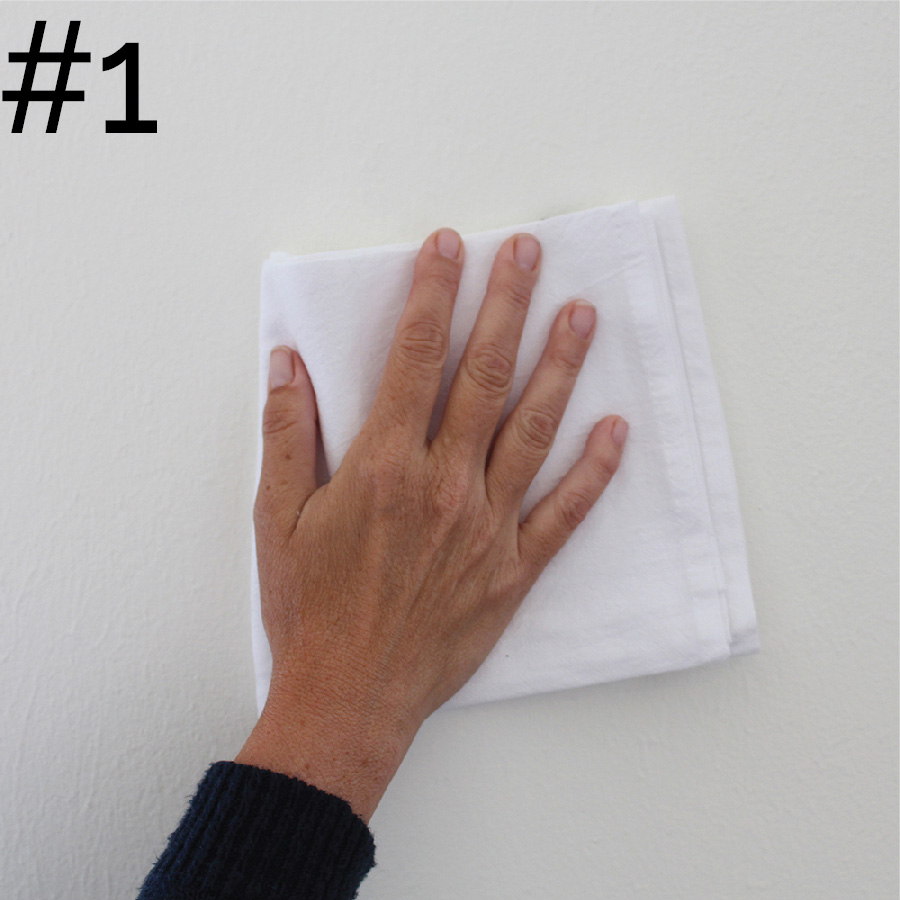
First, be sure the surface is CLEAN and DRY before installing your decal.
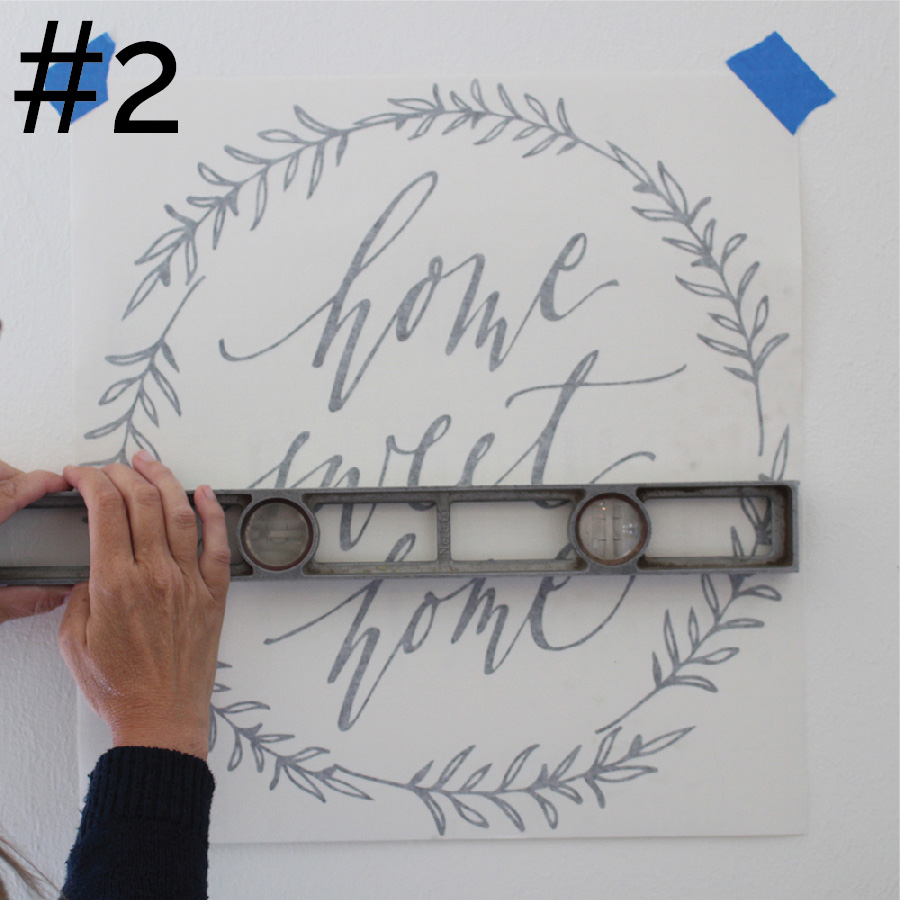
Secure your decal in place with painter's tape and if needed use a level to be sure it is straight.
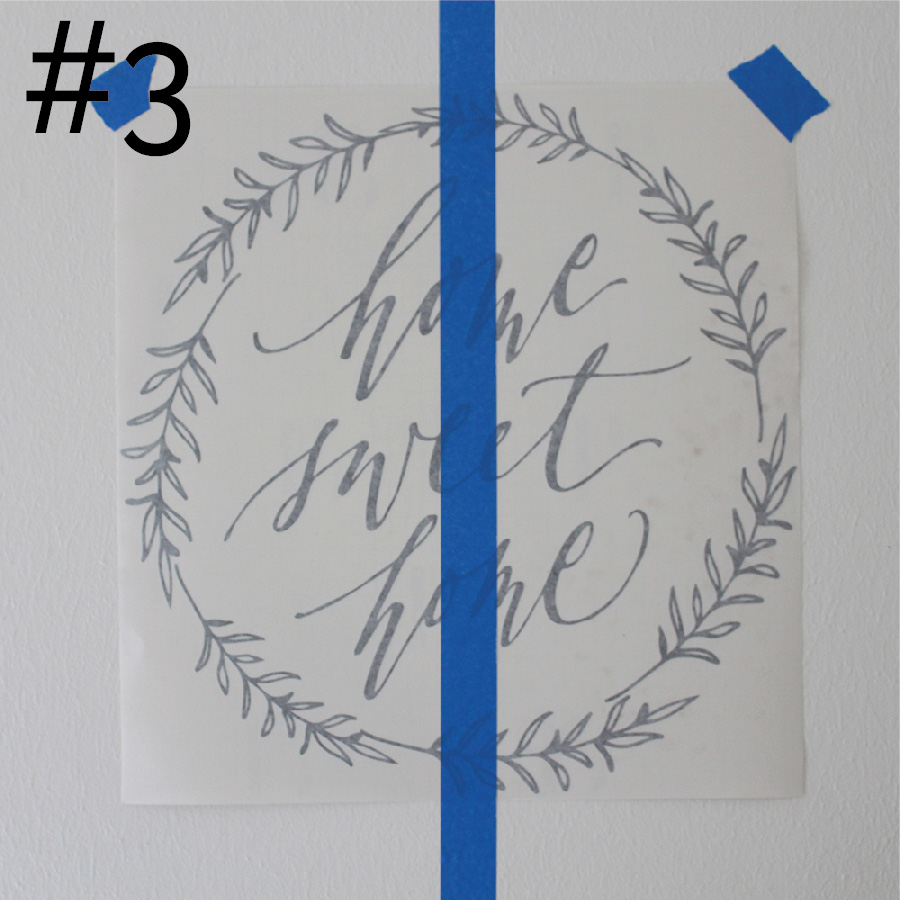
Place a long piece of tape down (or across) the middle of the design.
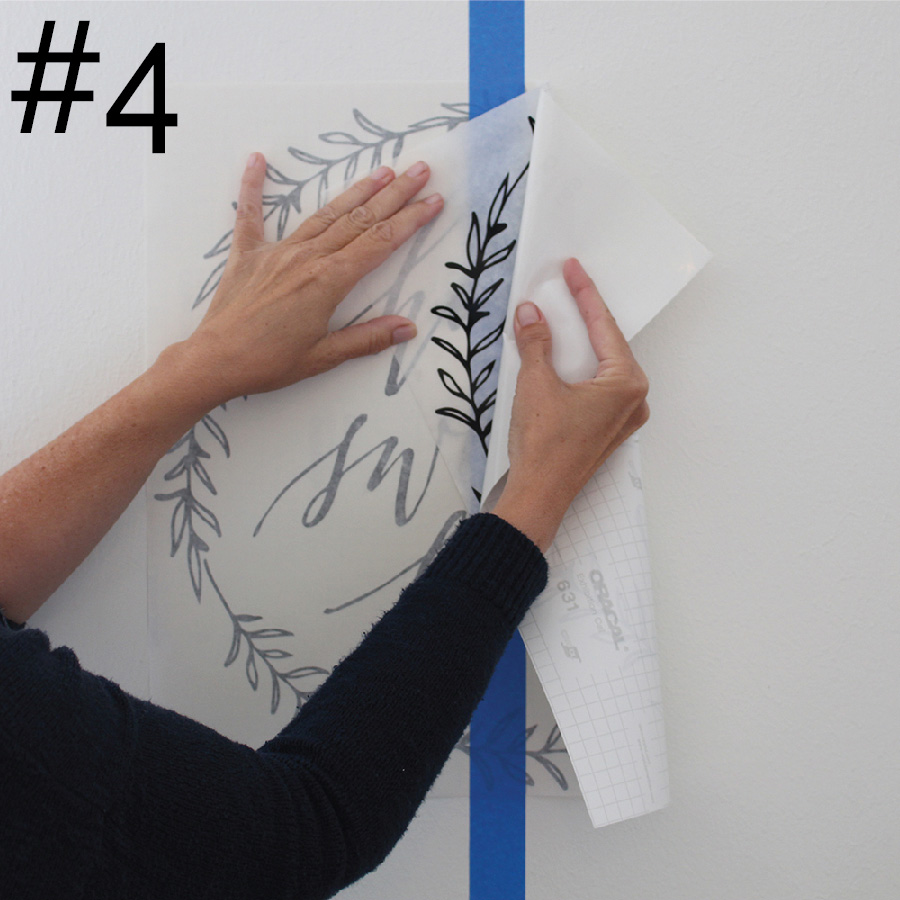
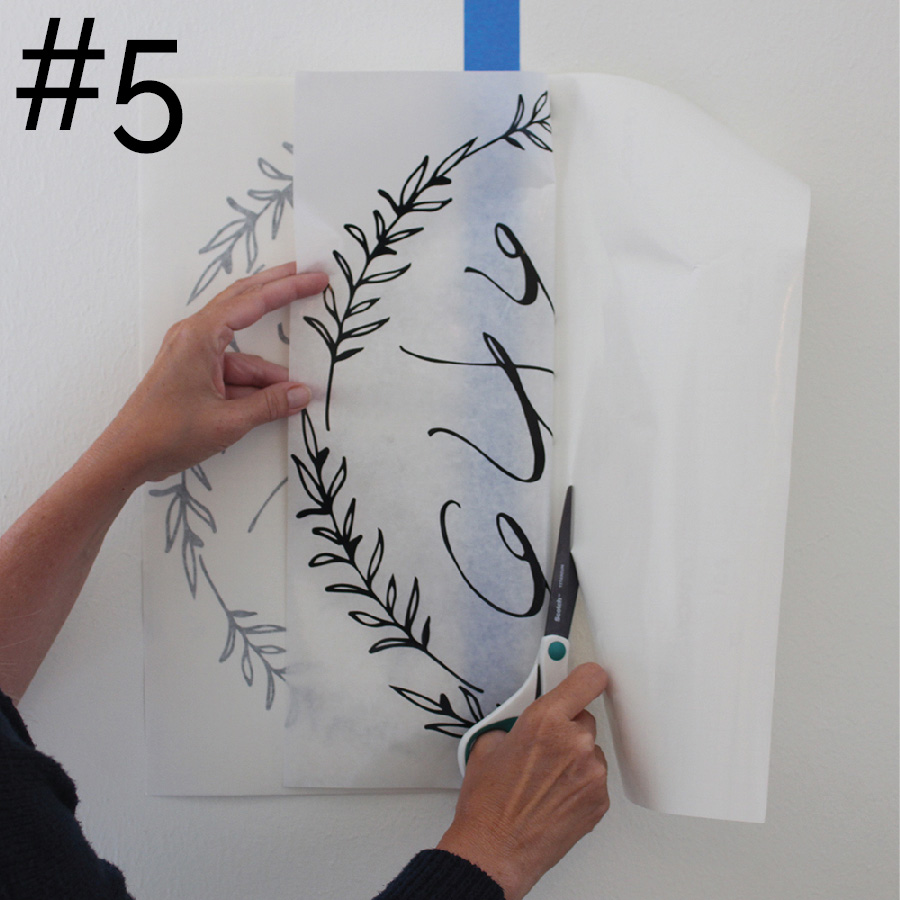
Fold over one half of the decal and seperate the thick backing paper at a sharp angle to be sure all the decal stays on the backing paper. The sticky side of the decal and transfer paper are now exposed so be sure to not let them fold over and stick to themselves.
Now cut the backing paper that you released with scissors (do not tar off) being careful not to cut into the transfer paper & don't let it stick to anything yet.
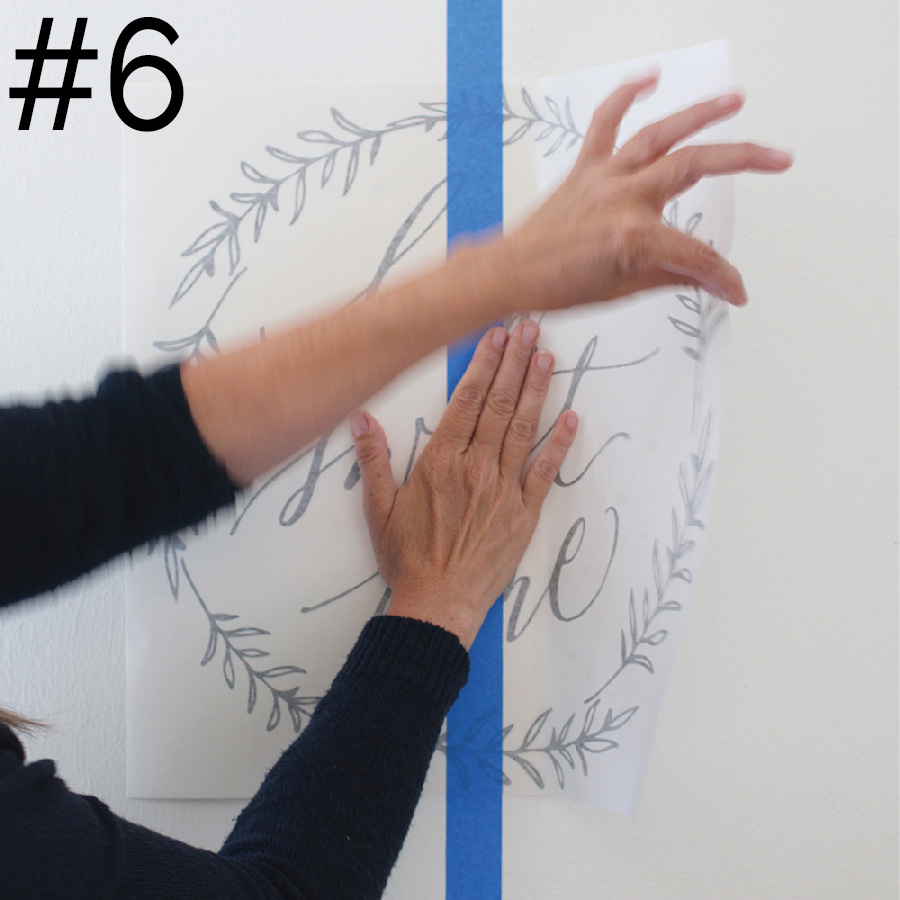
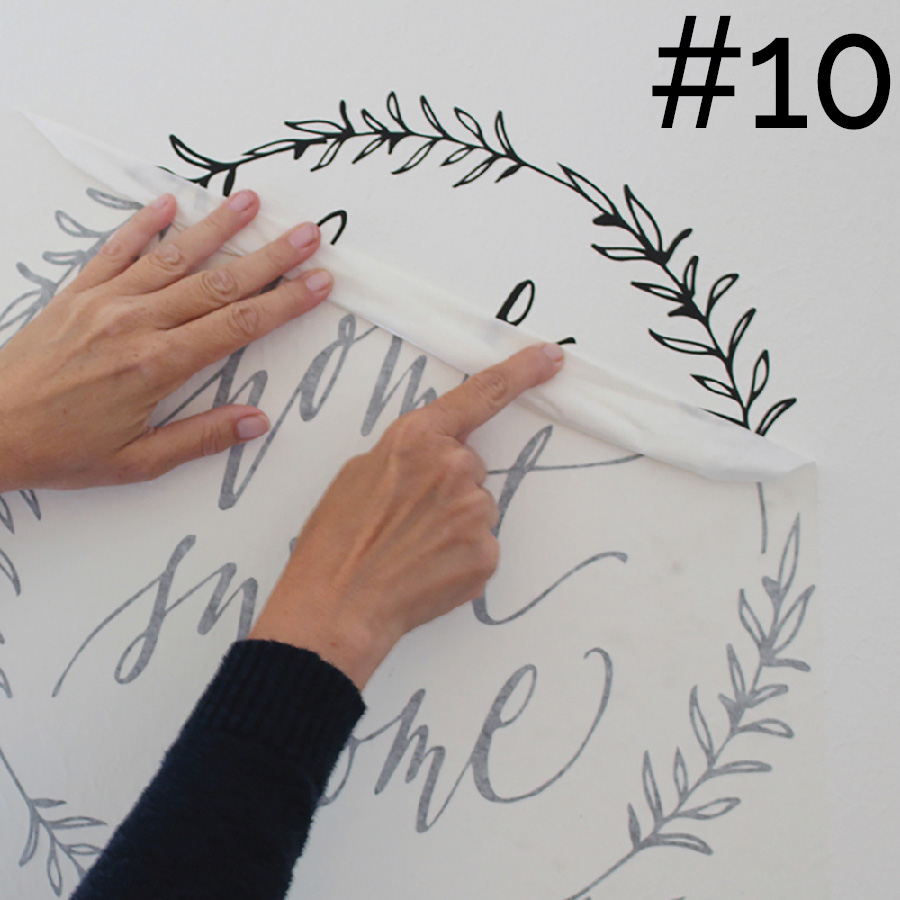
While holding the decal away from the wall (this is where an extra pair of hands come in handy!) start from the center and press the transfer paper onto the wall.
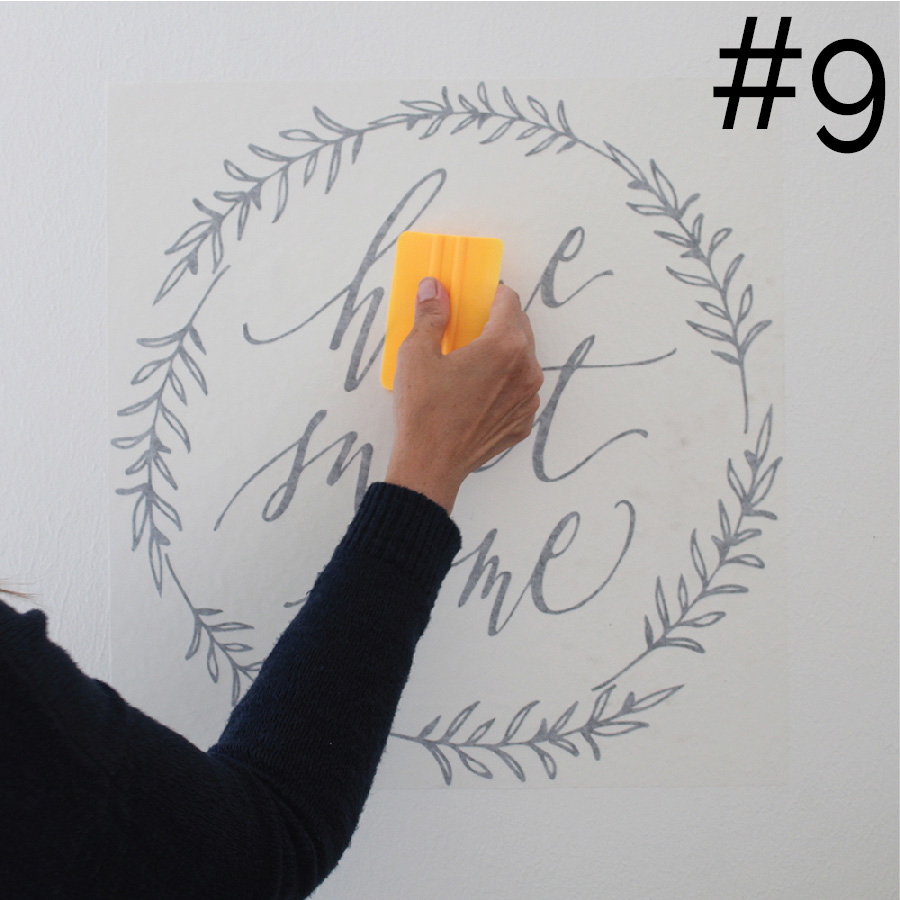
Now use a squeegee or credit card to rub the decal onto the wall using a starburst pattern to get the air bubbles out and adhere it well to the wall.
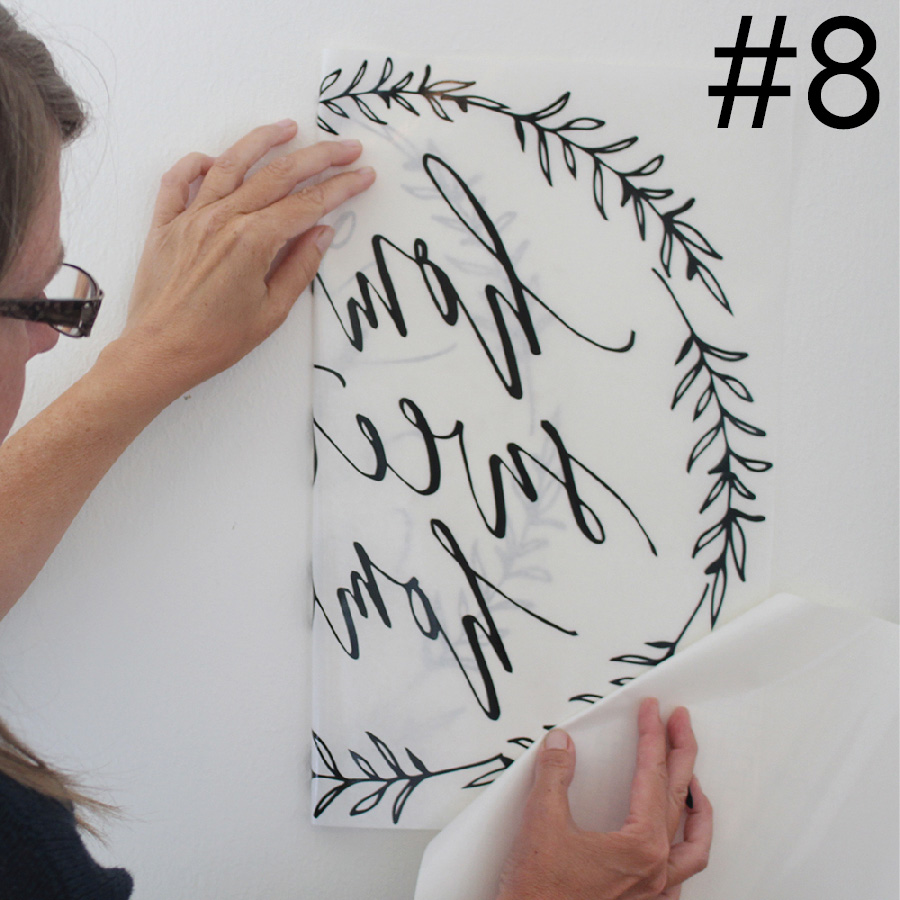
Remove any painter's tape, flip back the other half and carefully repeat step #4.
Repeat steps #5, #6 and #7 making sure to remove air bubbles and that the decal has adhered well to your surface.
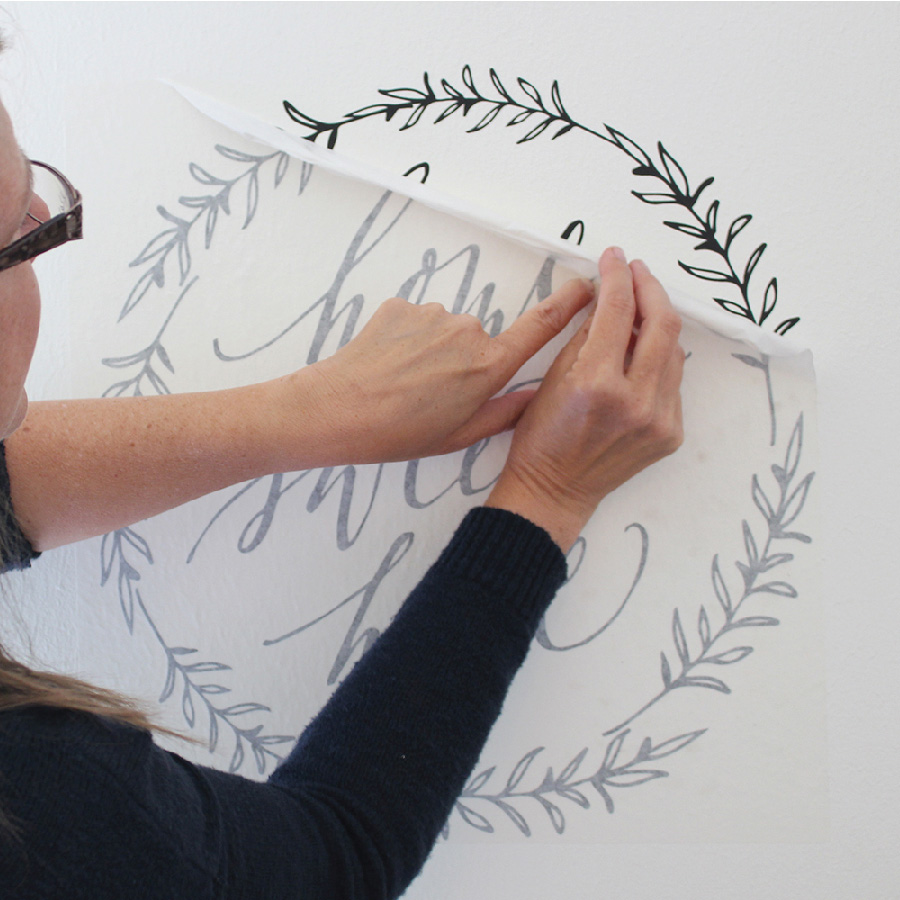
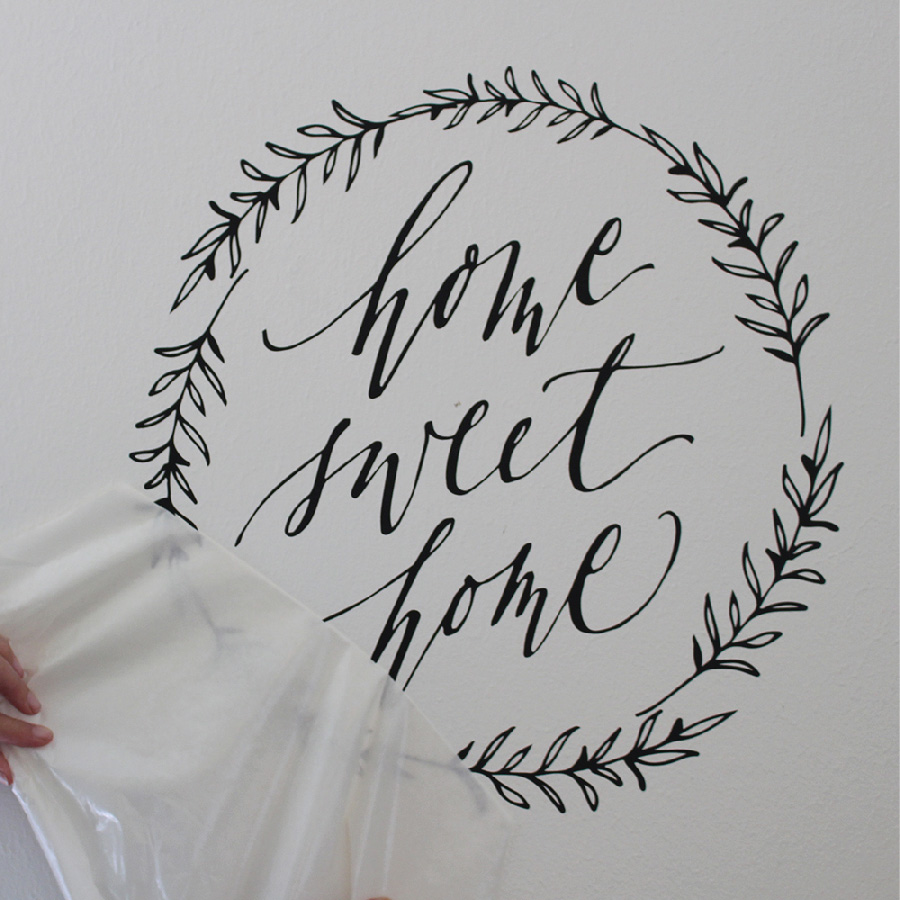
Carefully roll back the transfer tape at a sharp angle keeping pressure against the decal & watching all parts of the design to be sure it is adhereing to the wall.
If parts of the decal come up with the transfer tape push the transfer tape back down on the wall and rub that area with your fingernail or squeegee.